
- Study history up to 30 days
- Up to 5 users simultaneously
- Has HEALTH certificate
- Study history up to 30 days
- Up to 5 users simultaneously
- Has HEALTH certificate
- Study history up to 30 days
- Up to 5 users simultaneously
- Has HEALTH certificate
- Study history up to 30 days
- Up to 5 users simultaneously
- Has HEALTH certificate
- Study history up to 30 days
- Up to 5 users simultaneously
- Has HEALTH certificate
- Study history up to 30 days
- Up to 5 users simultaneously
- Has HEALTH certificate
- Study history up to 30 days
- Up to 5 users simultaneously
- Has HEALTH certificate
- Study history up to 30 days
- Up to 5 users simultaneously
- Has HEALTH certificate
- Study history up to 30 days
- Up to 5 users simultaneously
- Has HEALTH certificate
- Study history up to 30 days
- Up to 5 users simultaneously
- Has HEALTH certificate
- Study history up to 30 days
- Up to 5 users simultaneously
- Has HEALTH certificate
- Study history up to 30 days
- Up to 5 users simultaneously
- Has HEALTH certificate
- Study history up to 30 days
- Up to 5 users simultaneously
- Has HEALTH certificate
- Study history up to 30 days
- Up to 5 users simultaneously
- Has HEALTH certificate
- Study history up to 30 days
- Up to 5 users simultaneously
- Has HEALTH certificate
- Study history up to 30 days
- Up to 5 users simultaneously
- Has HEALTH certificate
- Study history up to 30 days
- Up to 5 users simultaneously
- Has HEALTH certificate
- Study history up to 30 days
- Up to 5 users simultaneously
- Has HEALTH certificate
- Study history up to 30 days
- Up to 5 users simultaneously
- Has HEALTH certificate
- Study history up to 30 days
- Up to 5 users simultaneously
- Has HEALTH certificate

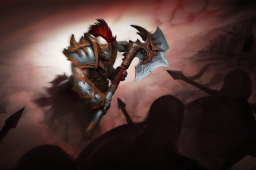
<a href="https://shardnest.com/product-category/bundle/" rel="tag">Bundle</a>
Barbarous Blades
<a href="https://shardnest.com/product-category/bundle/" rel="tag">Bundle</a>
Barbarous Blades

<a href="https://shardnest.com/product-category/loading-screen/" rel="tag">Loading Screen</a>
Barren Survivor Loading Screen
<a href="https://shardnest.com/product-category/loading-screen/" rel="tag">Loading Screen</a>
Barren Survivor Loading Screen
<a href="https://shardnest.com/product-category/loading-screen/" rel="tag">Loading Screen</a>
Battle Dress of the Proven Loading Screen
<a href="https://shardnest.com/product-category/loading-screen/" rel="tag">Loading Screen</a>
Battle Dress of the Proven Loading Screen
<a href="https://shardnest.com/product-category/loading-screen/" rel="tag">Loading Screen</a>
Battle Dress of the Proven Loading Screen
<a href="https://shardnest.com/product-category/hud-skin/" rel="tag">HUD Skin</a>
Battle Pass 2022 HUD
<a href="https://shardnest.com/product-category/hud-skin/" rel="tag">HUD Skin</a>
Battle Pass 2022 HUD
<a href="https://shardnest.com/product-category/hud-skin/" rel="tag">HUD Skin</a>
Battle Pass 2022 HUD

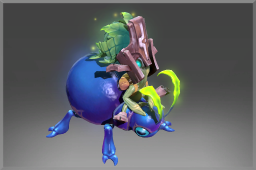
<a href="https://shardnest.com/product-category/ward/" rel="tag">Ward</a>
Beaks n’ Bubbles
<a href="https://shardnest.com/product-category/ward/" rel="tag">Ward</a>
Beaks n’ Bubbles
<a href="https://shardnest.com/product-category/ward/" rel="tag">Ward</a>
Beaks n’ Bubbles

<a href="https://shardnest.com/product-category/bundle/" rel="tag">Bundle</a>
Bearer of the Arkturan Talon
<a href="https://shardnest.com/product-category/bundle/" rel="tag">Bundle</a>
Bearer of the Arkturan Talon
<a href="https://shardnest.com/product-category/bundle/" rel="tag">Bundle</a>
Bearer of the Arkturan Talon

<a href="https://shardnest.com/product-category/sticker/" rel="tag">Sticker</a>
beastcoast Team Sticker – TI 2022
<a href="https://shardnest.com/product-category/sticker/" rel="tag">Sticker</a>
beastcoast Team Sticker – TI 2022
<a href="https://shardnest.com/product-category/sticker/" rel="tag">Sticker</a>
beastcoast Team Sticker – TI 2022
<a href="https://shardnest.com/product-category/courier/" rel="tag">Courier</a>